2D
Animation Driven
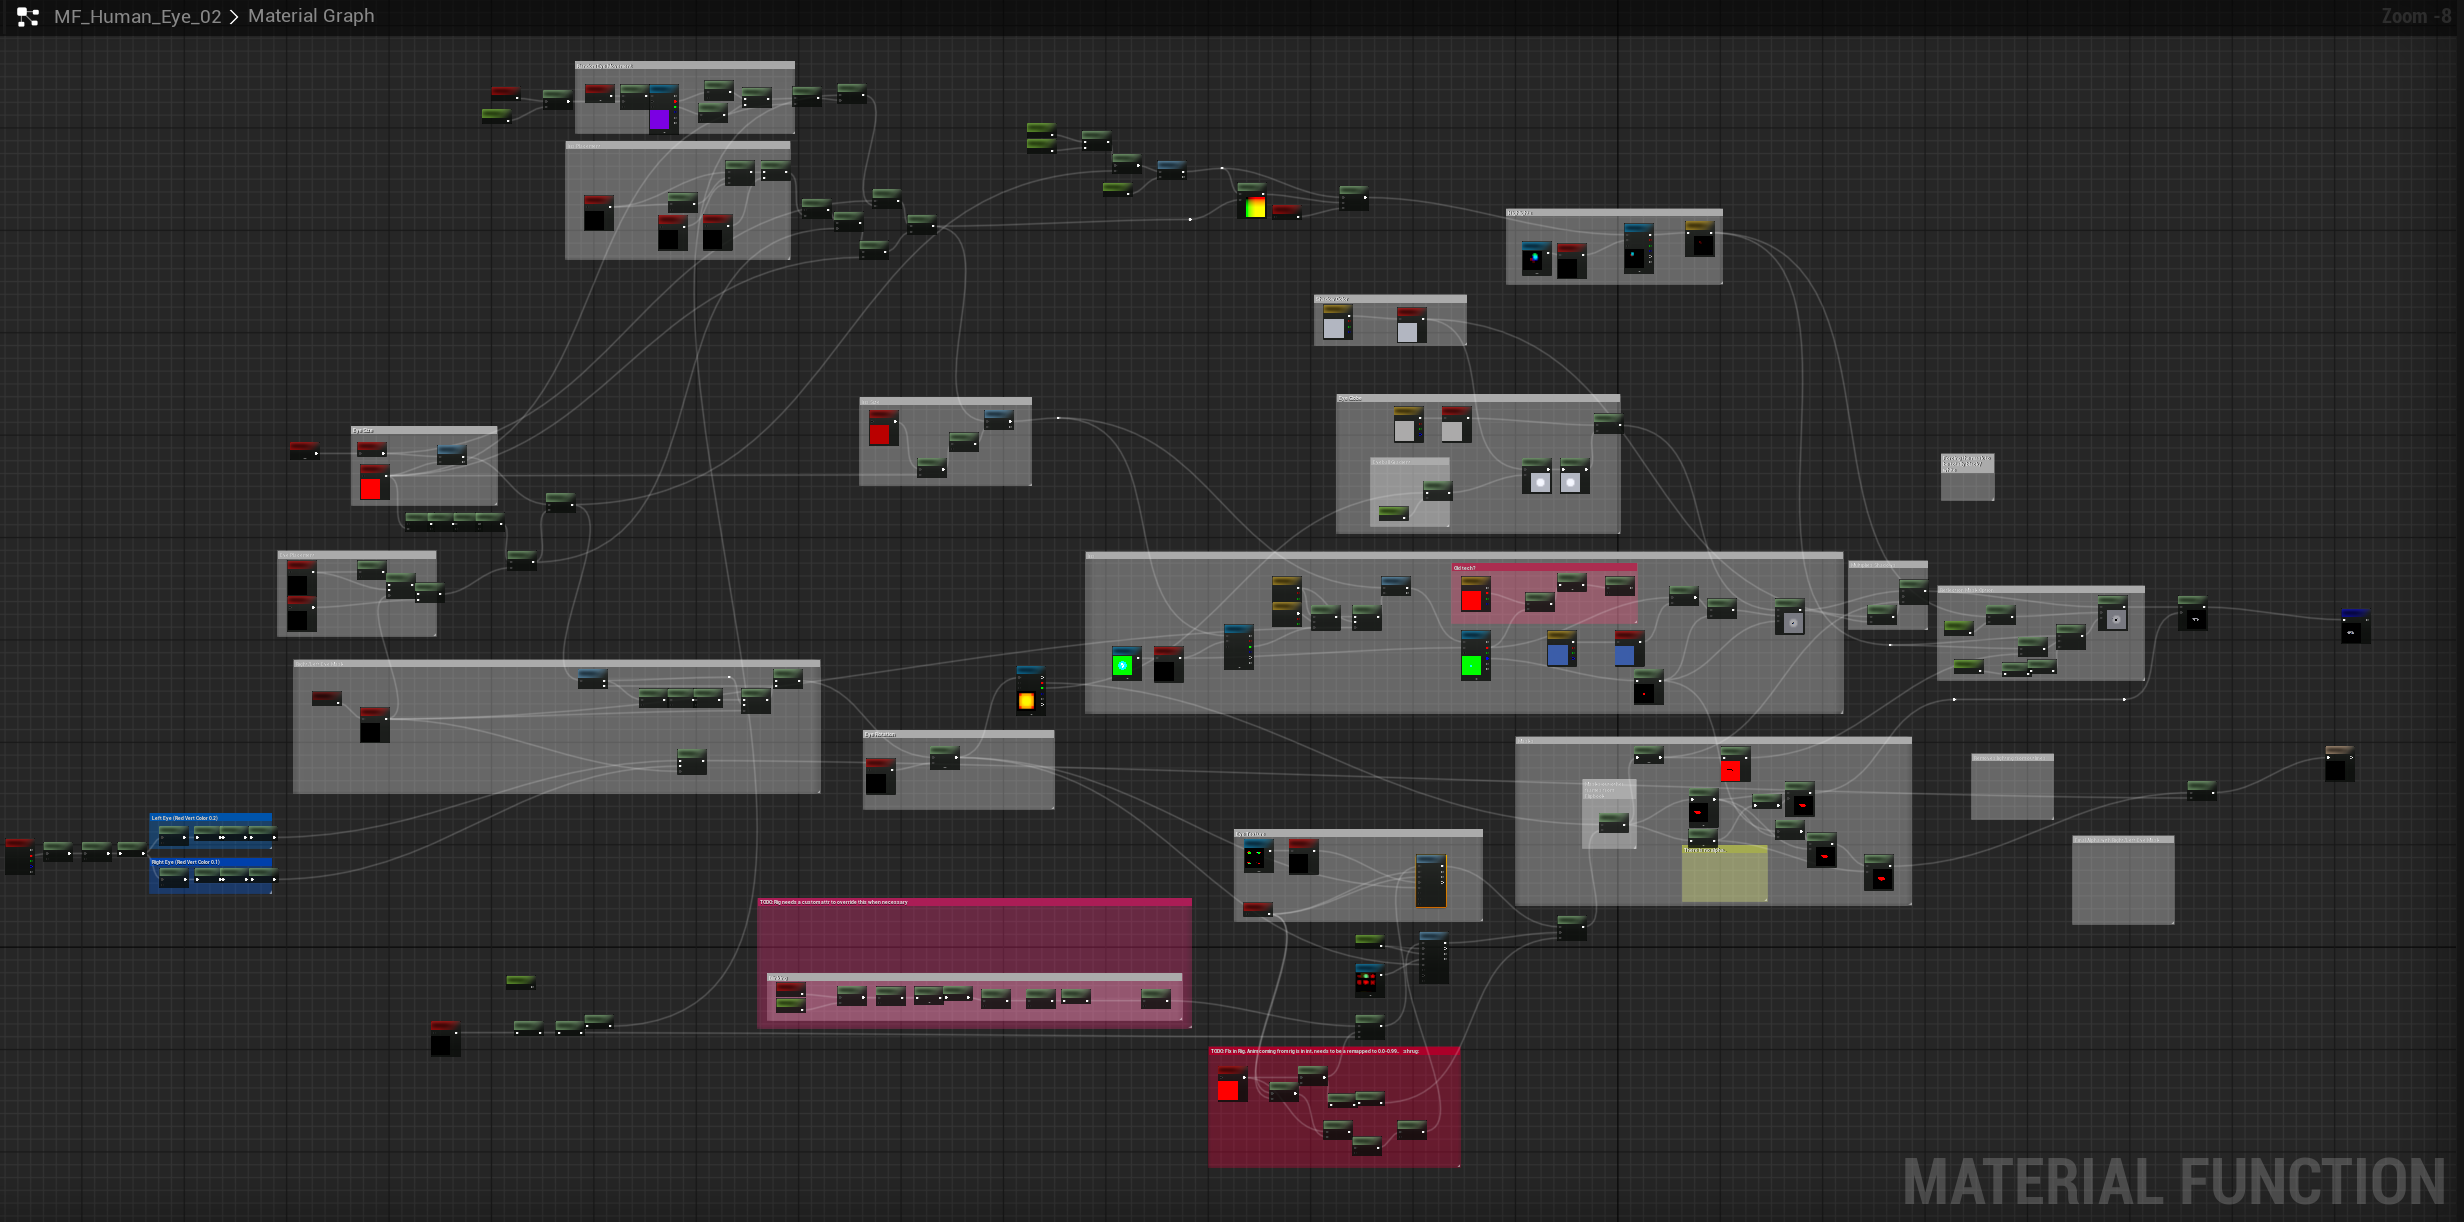
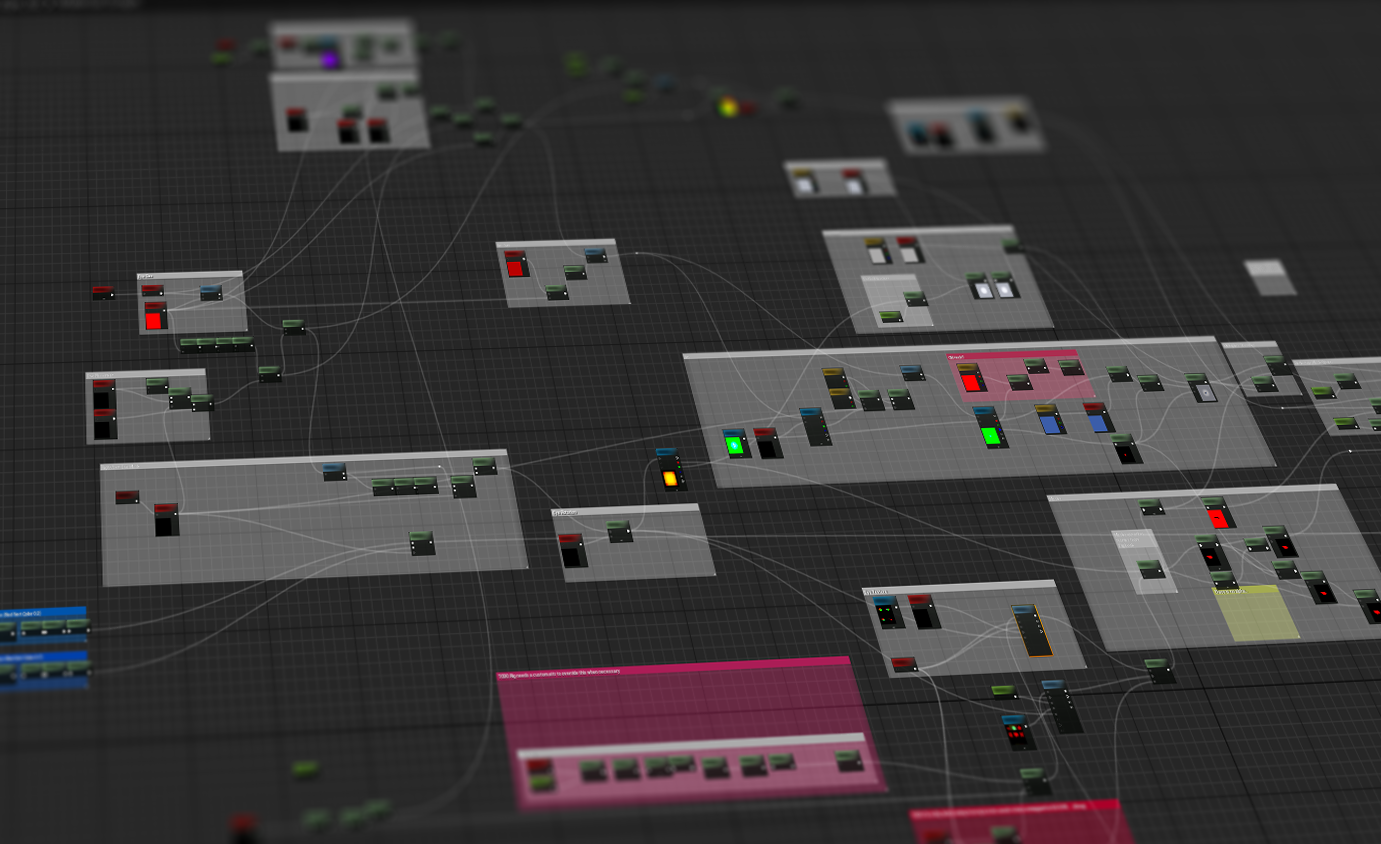
Material Setup
Unreal Editor, Maya, Materials
The Mission
System needed for allowing character 2D card eye animations.
The original setup only had an auto-blink and random movement material in Unreal.
Main work areas:
Maya
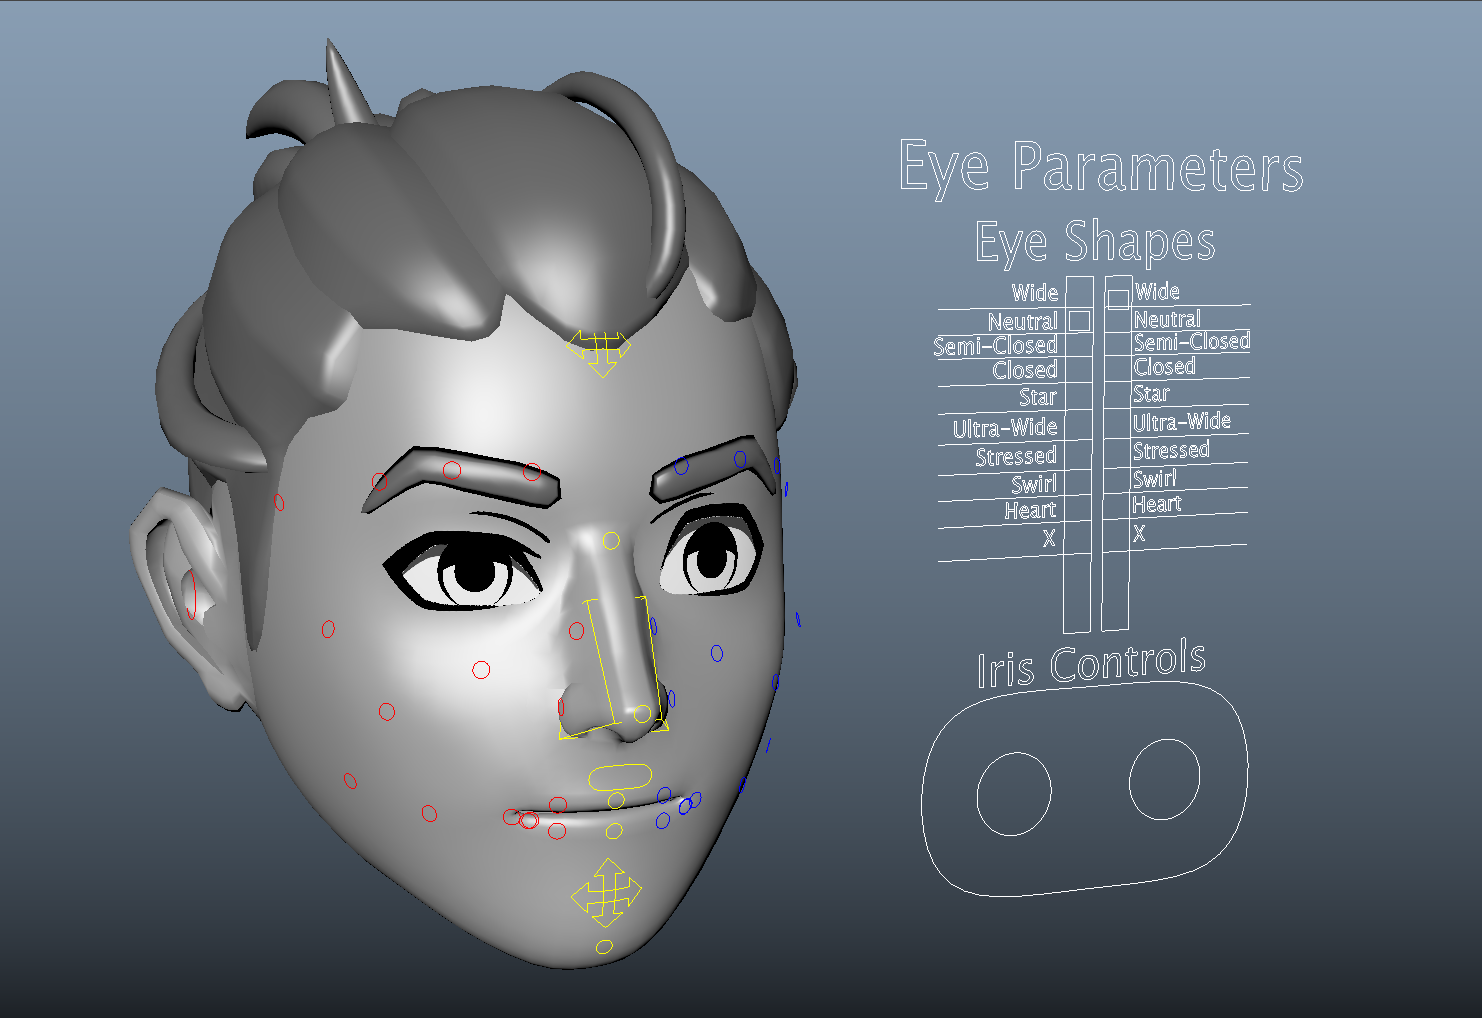
Custom attribute bone added to character rig
Hypershade material setup to match Unreal material for 1-to-1 parity
Ability to look-dev bespoke NPC character eyes in Maya to match Unreal
Simple rig UI for control
Unreal
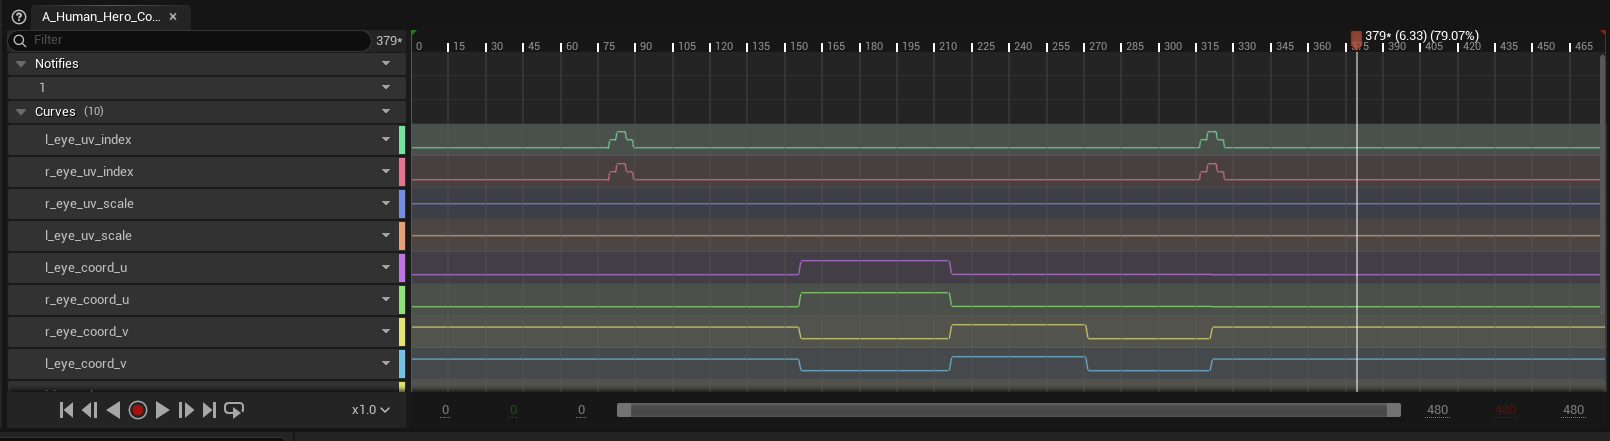
Import and skeleton settings to make from connection animations to material instances
Auto setting UV coordinate curves to stepped on import
Utility for adding default curves retroactively on older animations
Material
Custom parameters for each animatable feature
Offsets for eye placement and rotation on model
Left and right eyes masked using vertex color
Maya Setup
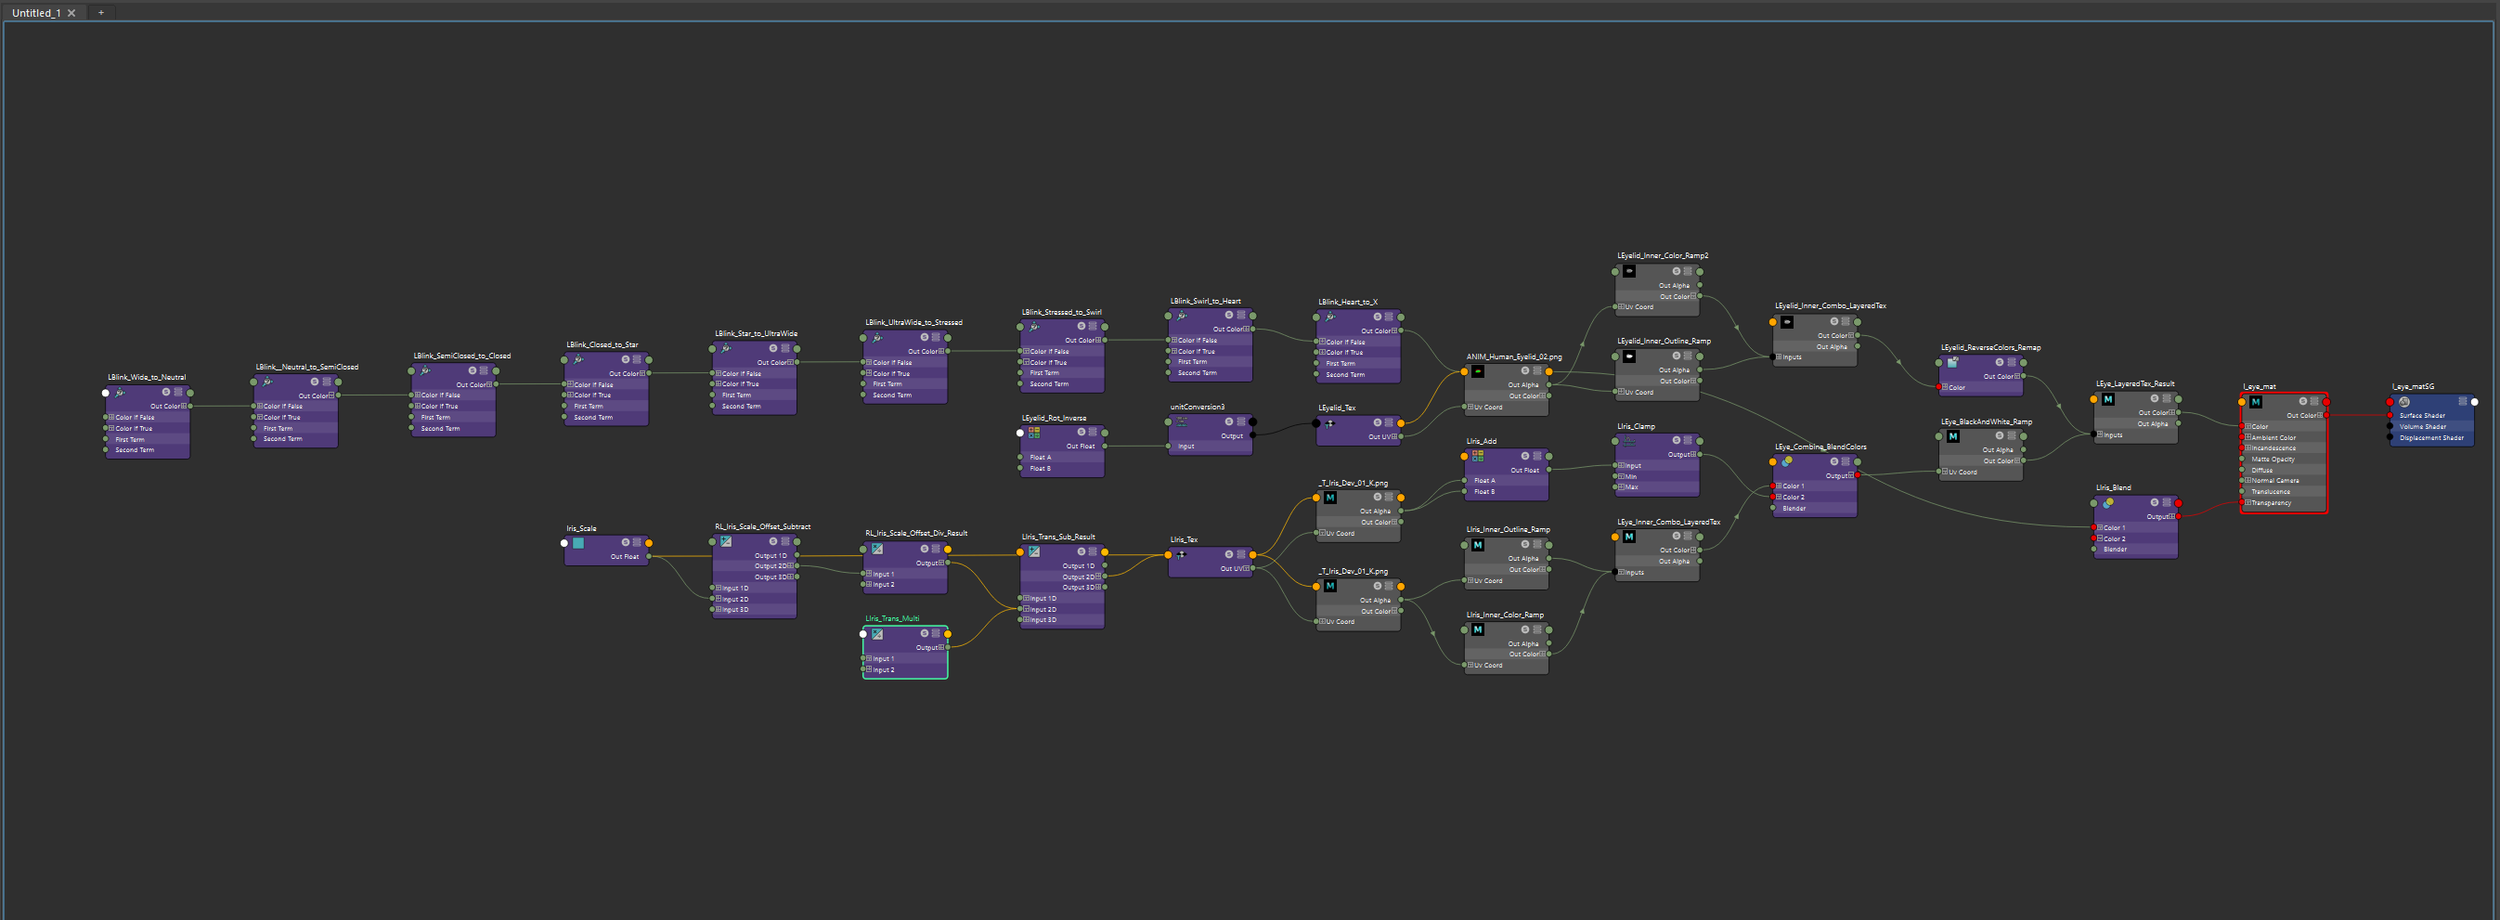
The material mimics the flipbook setup created in Unreal, this was the hardest part of the setup as Maya has some.. unique ways of setting up math in their nodes. With some logic originally created in the expression editor and with minimal rig controls, I handed it off to our technical animator to optimize and integrate the custom attribute bone into the animation exporter. They also polished the UI, adding labels for each eye state!
Unreal Setup
The flipbook portion was set up previously by our art director, so I added the plumbing to match the animated parameter names in the driving animations. We turned on the switches in the import settings and character skeleton to create the animation to material connection, and it worked! Now the animators could get full eye emotion for the conversation close-ups in the game.